> ## Documentation Index
> Fetch the complete documentation index at: https://docs.zbdpay.com/llms.txt
> Use this file to discover all available pages before exploring further.
# Integrating
> Learn how to integrate ZBD Login into your application.
`ZBD Login` follows the [RFC 6749](https://datatracker.ietf.org/doc/html/rfc6749) standards in order to provide the best and safest experience to users. ZBD's OAuth2 implementation requires [PKCE (Proof Key for Code Exchange)](https://oauth.net/2/pkce/) as an additional feature for making sure the entire authentication flow is secure.
## OAuth2 API
The authorization sequence begins when your app redirects a browser to a ZBD URL. The URL includes query parameters that indicate the type of access being requested. ZBD handles authentication, session selection and user consent. The result is an authorization code, which the application can exchange for an `access token` and a `refresh token`.
The app must store the `refresh token` for future use and use the `access token` to fetch user data through the ZBD API. When the `access token` expires, the app will use the `refresh token` to request a new one.
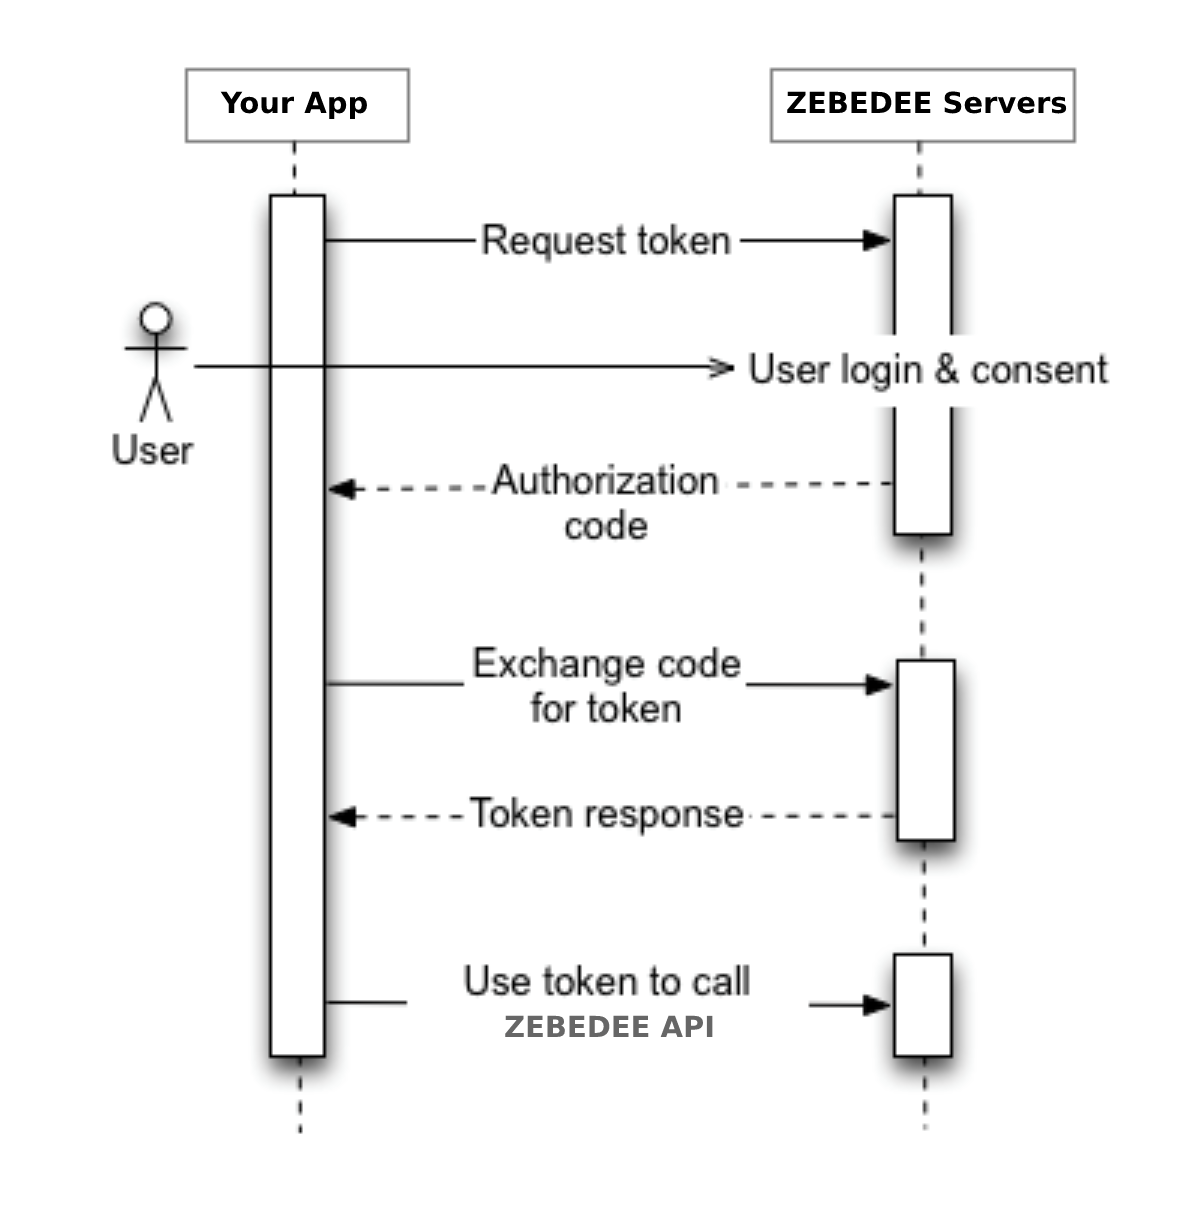
In order to properly redirect users to the ZBD login portal, you must open a browser session containing the built `authorization URL` as the destination address.
### Authorization URL
* Authorization: `GET` [https://api.zbdpay.com/v1/oauth2/authorize](https://api.zbdpay.com/v1/oauth2/authorize)
* In case you are building this URL yourself, without the use of libraries that support PKCE, the following properties are needed, as query params:
* `client_id` = \
* `response_type` = code
* `redirect_uri` = \
* `code_challenge_method` = S256
* `code_challenge` = \
> After accessing the ZBD login portal URL and successfully authenticating, the user will be redirected back to your application with `state` and `code` query parameters included. These two properties allow you to hit the `token` endpoint, and get the user's `accessToken`.
### Getting the Token
* Token: `POST` [https://api.zbdpay.com/v1/oauth2/token](https://api.zbdpay.com/v1/oauth2/token)
* Once you have the `code` returned from the previous `authorization` endpoint, you must now make a `POST` request to the token endpoint, with the following properties:
```json theme={null}
{
"client_id": "{{client_id}}",
"client_secret": "{{client_secret}}",
"code": "{{code}}",
"code_verifier": "{{code_verifier}}",
"grant_type": "authorization_code",
"redirect_uri": "{{your_url_callback}}"
}
```
* And, as response, you should receive the user's `accessToken`:
```json theme={null}
{
"accessToken": "{{userAccessToken}}"
}
```
### Getting ZBD User Profile Data
* Profile: `GET` [https://api.zbdpay.com/v1/oauth2/user](https://api.zbdpay.com/v1/oauth2/user)
* You can now call the ZBD API endpoints passing the provided `accessToken` from the previous endpoint on the request authorization header.
```json theme={null}
Response: {
"data": {
"email": "testzebedee2@gmail.com",
"gamertag": "testzebedee",
"id": "6109484f-08e6-479a-a044-be930d89b42a",
"image": "https://lh3.googleusercontent.com/a/AATXAJwNvpB49NrxF41KVrEFX9k1v93WoMAMBb4wBF7Q=s96-c",
"isVerified": true,
"lightningAddress": "testzebedee@zbd.gg",
"publicBio": "Welcome to my zbd.gg page!",
"publicStaticCharge": "lnurl1dp68gurn8ghj7ar9wd6zu7n9vfjkget99e5k7tmkxqhhyet3w4jhxapdwd6xzarfvvkkx6rpwfnk2ue0x56nxvrpxuervtfkxa3rgtf5xu6k2ttzxy6nstt9xsurgvejx5exydpjvc9v9tk7",
"social": {
"twitter": "gamertag",
"website": "https://example.com",
},
},
"success": true,
}
```
### Getting ZBD User Wallet Data
* Profile: `GET` [https://api.zbdpay.com/v1/oauth2/wallet](https://api.zbdpay.com/v1/oauth2/wallet)
* You can now call the ZBD API endpoints passing the provided `accessToken` from the previous endpoints on the request authorization header.
```json theme={null}
Response: {
"data": {
"balance": "98251000",
"remainingAmountLimits": {
"daily": "1000000000",
"maxCredit": "4901749000",
"monthly": "25000000000",
"weekly": "5000000000",
},
},
"message": "Successfully fetched user wallet.",
"success": true,
}
```
It is common for software libraries and prebuilt packages to handle a lot of
this heavy-lifting for you, except for the `Getting the Token` part, which is
a true secret and should be handled in your secure backend system services.
## Integration
### Get Credentials from ZBD Developer Dashboard
In order to be able to implement `ZBD Login` functionality, you must first get your application/game's OAuth2 `Client ID` and `Client Secret`, and set up proper redirect URLs.
### Getting Keys
After creating a game inside of the ZBD Developer Dashboard, head on over to the `OAuth2` tab inside of that game's single details view.
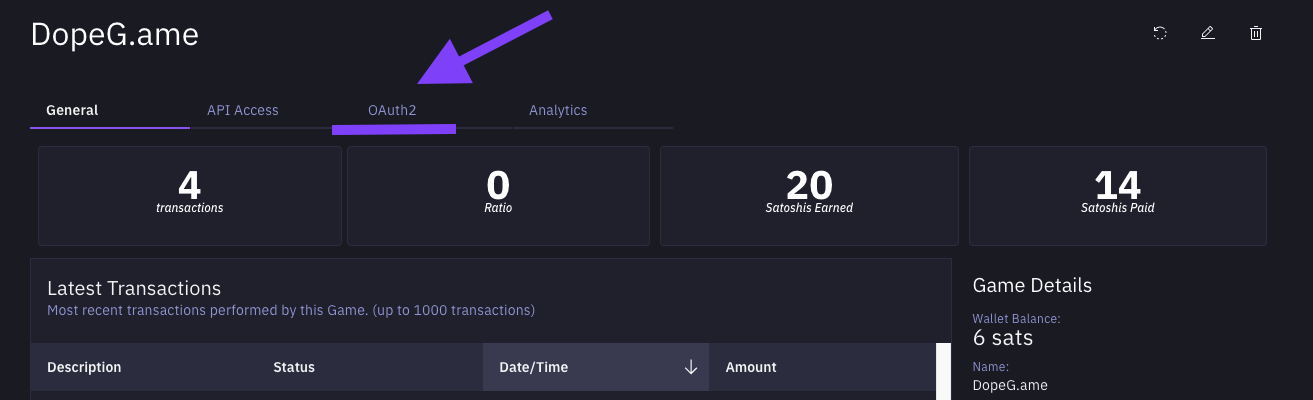
You can now get your `Client ID` (first field) and `Client Secret` (second field).
Keep your secrets secure and safe. Don't share secrets with others. Don't
commit secrets into your code.
### Setting Redirect URLs
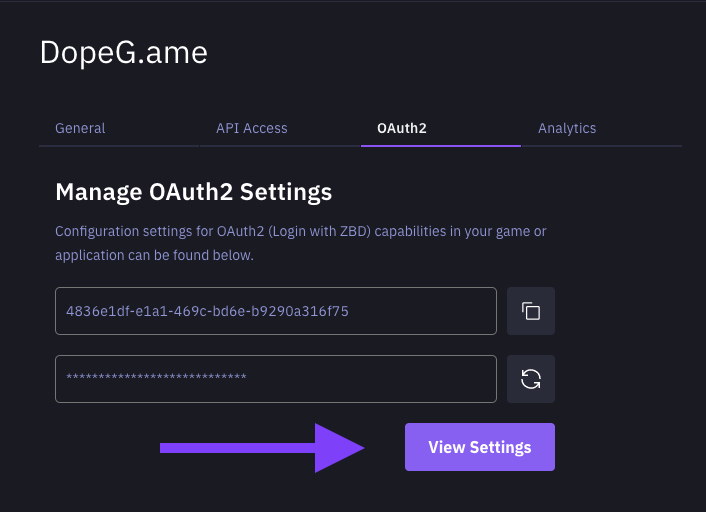
Now its time to set up your OAuth2 redirect URLs. Head on over to the OAuth2 settings modal through the `View Settings` button.
> It is a requirement that the same redirect URL be used in the first step of the OAuth2 flow (`authorization endpoint`) - if you set a redirect URL different from the one being used when building the authorization URL, or if you don't set a redirect URL at all, the Authorization redirect will not work.
From the opened OAuth2 Settings modal, you can add up to 3 redirect URLs (whether native mobile URIs or HTTPS-based URLs). To get started use the `+` button.
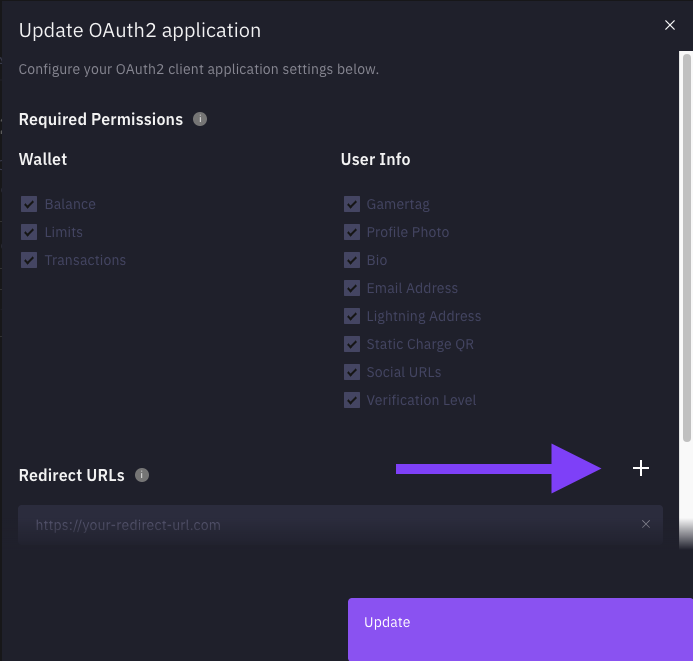
Once you've added your redirect URLs / app schemas, you can save by clicking `Update`. You're now all set up for using `ZBD Login` on your application. For more detailed examples [check out the OAuth2 Code Walkthrough for source code and LOC explanation](/earn/oauth2/walkthrough).