> ## Documentation Index
> Fetch the complete documentation index at: https://docs.zbdpay.com/llms.txt
> Use this file to discover all available pages before exploring further.
# Create Project
> Set up your first ZBD project and unlock the power of Lightning payments
Projects are your gateway to the future of payments. Each project gets its own Lightning wallet, API keys, and analytics – everything you need to integrate ZBD into your app or game.
**One Account, Multiple Projects** - Create separate projects for different apps, environments, or business units. Each project has isolated wallets and permissions.
## Why Projects Matter
Each project has its own Bitcoin Lightning wallet with separate balances
Get your API key per project with specific permissions
Track performance metrics per project independently
## Creating Your First Project
### Step 1: Navigate to Projects
From your dashboard, click **Projects** in the sidebar and then the **+ New Project** button.
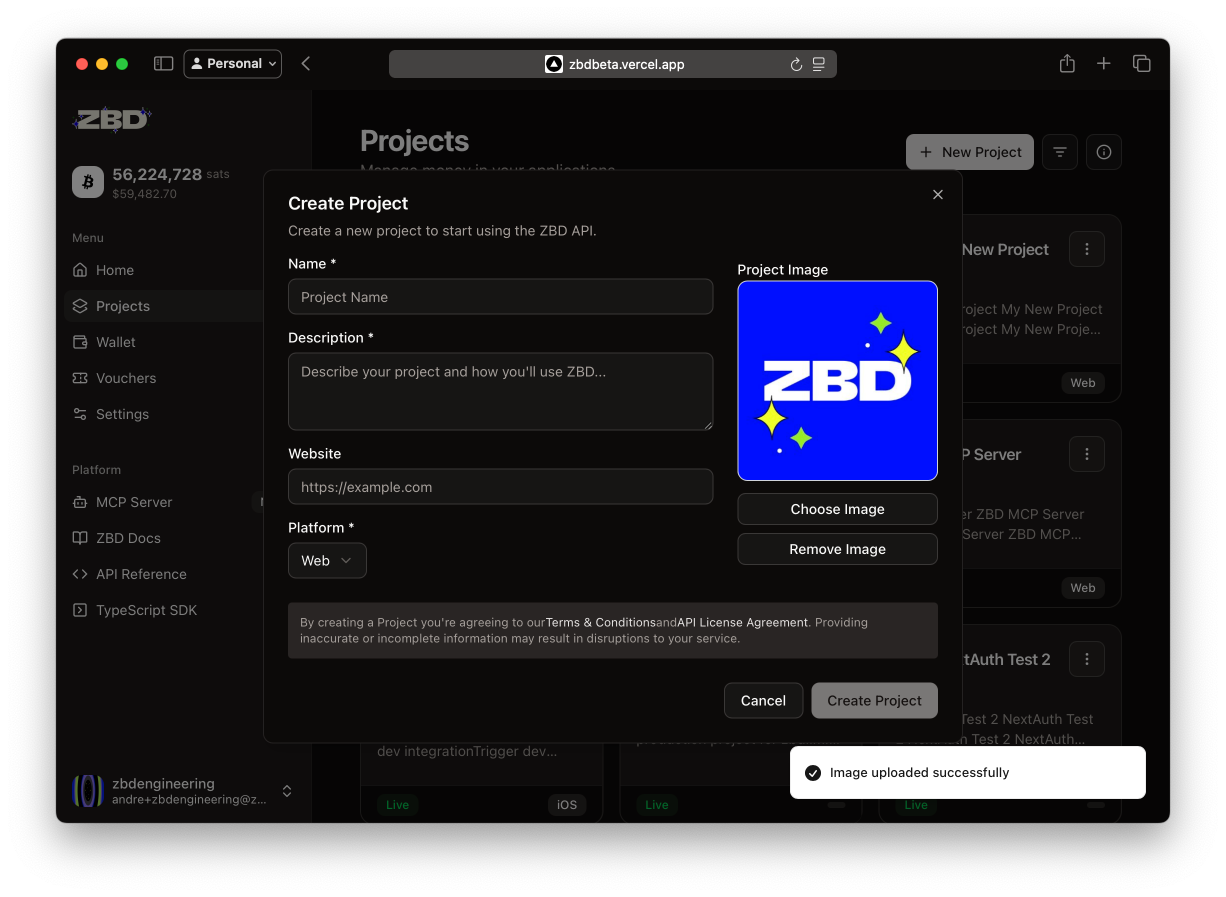 ### Step 2: Configure Your Project
Fill in your project details in the creation modal:
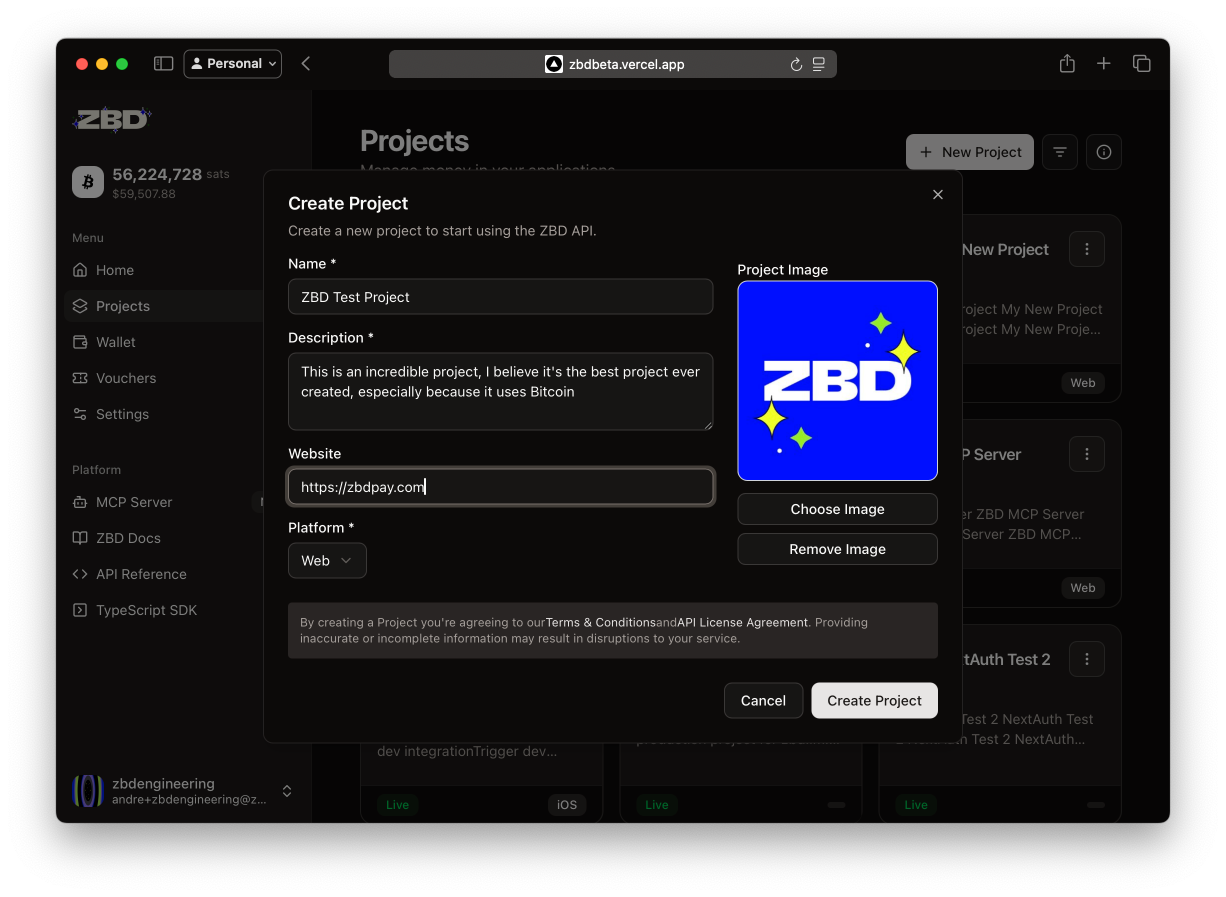
### Step 2: Configure Your Project
Fill in your project details in the creation modal:
 ### Step 3: Create and Explore
Click **Create Project** and you will be redirected to your new project's wallet page.
## What Happens Next
Once your project is created, you instantly get:
A programmable Bitcoin Lightning wallet ready for instant global payments
Head to the API Keys tab to generate your first key
Use our SDKs to send your first payment in minutes
## Project Best Practices
### Environment Strategy
Create separate projects for each environment:
* **MyGame - Development**: Sandbox testing with test transactions
* **MyGame - Staging**: Pre-production testing with real money
* **MyGame - Production**: Live environment for real users
This separation ensures clean analytics and prevents accidental transactions.
Organize projects by application:
* **Mobile Game**: iOS and Android API keys sharing one wallet
* **Web Platform**: Separate wallet with frontend/backend keys
* **Tournament System**: Isolated wallet for prize pools
Each app gets its own analytics and wallet management.
### Common Use Cases
* **Separate projects per game** for isolated economies
* **Shared project for tournaments** across multiple games
* **Dev/staging/prod projects** for each game
* **API product project** for usage-based billing
* **Marketplace project** for user-to-user payments
* **Regional projects** for compliance separation
* **Client projects** with isolated wallets
* **Demo project** for POCs and sales
* **Template projects** for quick starts
## Quick Actions After Creation
Generate your first API key to start integrating
Add funds to start processing payments
Use our SDK to send your first Lightning payment
## Success! You have Created Your First Project 🎉
You are now ready to revolutionize payments in your application. Your Lightning wallet is active and waiting for its first transaction.
**Generate Your API Keys** - Get your API credentials and send your first payment in under 5 minutes.
***
Quick start guides for all languages
Explore all available endpoints
### Step 3: Create and Explore
Click **Create Project** and you will be redirected to your new project's wallet page.
## What Happens Next
Once your project is created, you instantly get:
A programmable Bitcoin Lightning wallet ready for instant global payments
Head to the API Keys tab to generate your first key
Use our SDKs to send your first payment in minutes
## Project Best Practices
### Environment Strategy
Create separate projects for each environment:
* **MyGame - Development**: Sandbox testing with test transactions
* **MyGame - Staging**: Pre-production testing with real money
* **MyGame - Production**: Live environment for real users
This separation ensures clean analytics and prevents accidental transactions.
Organize projects by application:
* **Mobile Game**: iOS and Android API keys sharing one wallet
* **Web Platform**: Separate wallet with frontend/backend keys
* **Tournament System**: Isolated wallet for prize pools
Each app gets its own analytics and wallet management.
### Common Use Cases
* **Separate projects per game** for isolated economies
* **Shared project for tournaments** across multiple games
* **Dev/staging/prod projects** for each game
* **API product project** for usage-based billing
* **Marketplace project** for user-to-user payments
* **Regional projects** for compliance separation
* **Client projects** with isolated wallets
* **Demo project** for POCs and sales
* **Template projects** for quick starts
## Quick Actions After Creation
Generate your first API key to start integrating
Add funds to start processing payments
Use our SDK to send your first Lightning payment
## Success! You have Created Your First Project 🎉
You are now ready to revolutionize payments in your application. Your Lightning wallet is active and waiting for its first transaction.
**Generate Your API Keys** - Get your API credentials and send your first payment in under 5 minutes.
***
Quick start guides for all languages
Explore all available endpoints